
GG
By
Content Writer
Updated on Jul 23, 2025


Screenshots have become a thing in this technological era. Be it for the texts, or some interesting info with pictures, we all have been accustomed to taking a snapshot right away. Not just for texting but screenshots have become an equally important part for those writing articles like me. Taking one on a mobile phone is pretty easy, but how to take screenshots on a laptop or a PC? I know, I know, most of the people know this but what if I tell you, there are still many people who do not know this? So, this article is for those who are looking for how to take screenshots on a laptop or PC.
 Meanwhile, you can check our other articles.
How to take screenshot on laptop / PC?
Print Screen / PrtScrn Method
There are several ways of taking screenshots on a laptop and PC. But the most common measure is using the print screen method. And here's how you can do it.No gallery images available
- First up, look at the upper right part of your keyboard and you'll notice the Print Screen key.
- Then, simply press the key move your crosshair to the desired part, and take a snapshot.
- If your "Print Screen" key is embedded on the Function Key, for example on the F12, then, you have to press that specific Function key and Print Screen button at the same time.
- Then, the screenshot will be stored in the "Pictures" section by default, or else, you can set it to your desired drive.
- You can also copy the screenshot to your clipboard and paste it directly into your social media text box.
Snipping Method
Well, the snipping method is now integrated into the Print Screen button. So, it doesn't offer a completely different experience. Still, let's give it a shot too:- Go to the search bar on your taskbar and search for "Snipping Tool"
- You'll find the scissor icon and open it.
- Then, click on the "+" icon, and then, you can take a screenshot of the desired part of your screen.
- Or else, you can press the Windows + Shift + S key at the same time for the snipping tool.
- Plus, you can also set the Snipping tool shortcut on your taskbar for easy access.
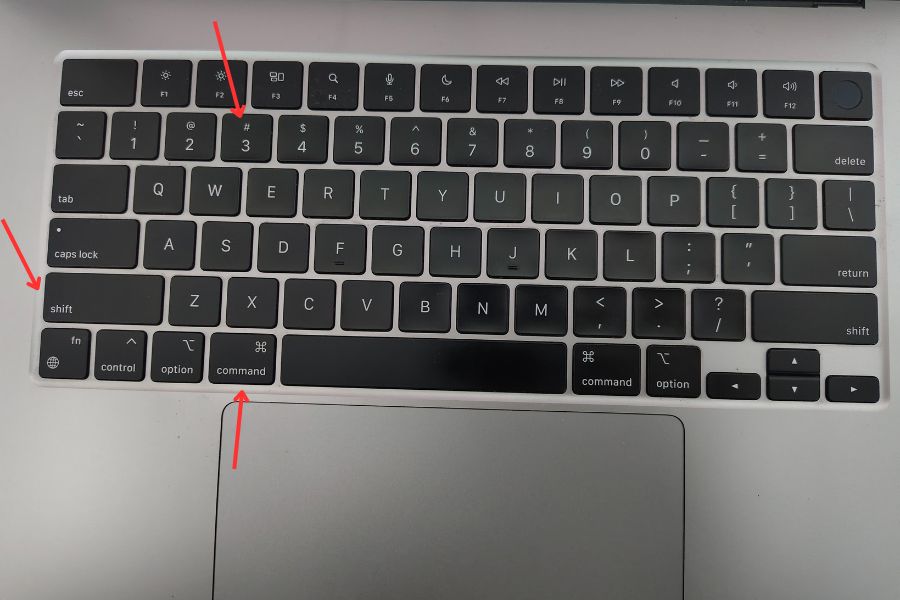
Taking a screenshot on a Macbook
On an Apple MacBook or iMac, here is how you can take a screenshot:- To capture the entire screen's snapshot, you can press Shift + Command + 3 button.
- In order to capture a portion of the screen, press Shift + Command + 4 and then move the crosshair to the desired part by pressing the mouse or trackpad button.
- Another way to take a screenshot on a Macbook is Shift + Command + 5, which calls up a small panel. You can find snapshot options: Capture Entire Screen, Capture Selected Window, and Capture a selected portion.
How did we do with this article?

No Active Polls
There are currently no polls available. Check back later for new polls to participate in!
Polls will appear here when available

Conversation
We’d love to hear your thoughts! Let's keep it respectful and on-topic. Any inappropriate remarks may be removed. Happy commenting! Privacy Policy
Be the first to share your thoughts—start the conversation!
Latest Articles
Best Tech Deals
No deals available.
Check back later for exciting deals!
More Articles
